
Self-Leveling Mortar: Uses, Advantages, and Tips for a Perfect Finish
He self-leveling mortar It's an essential material in modern renovations, thanks to its ability to provide smooth, even surfaces ready for the final finish. Whether you're leveling a floor before laying tiles or renovating outdoor spaces, this material combines efficiency and professional results. In this article, we'll explore the differences between self-leveling cement and leveling paste, their uses, benefits, and how you can apply it to transform any DIY project.
What is Self-Leveling Mortar?
Self-leveling mortars maintain the viscosity of the product in such a way that it remains uniform in composition from top to bottom without the sand aggregates sinking to the bottom of the installed layer.
He self-leveling mortar It is a mixture of cement, additives and water that, when applied, spreads and levels itself without the need for intensive work with tools.
This self-leveling cement is ideal for correcting uneven surfaces and preparing them for finishes such as tiles, wood, vinyl or carpets, or epoxy paint.
Main uses of Self-Leveling Mortar
- Preparation of interior floors:
Perfect for smoothing surfaces before installing flooring such as stoneware, parquet, vinyl or epoxy paint. - Outdoor application:
Specially designed for terraces or patios, ensuring proper drainage and a uniform surface. - Surface rehabilitation:
Ideal for correcting cracks, unevenness and wear in existing floors. - Decorative finishes:
Some versions allow for a visible finish, perfect for industrial or modern styles. - Base for radiant heating systems:
Its ability to adapt to different thicknesses makes it compatible with underfloor heating installations.
Advantages of Self-Leveling Mortar
| ✅ Advantages | ❌ Contras |
|---|---|
| Easy application, ideal for beginners. | Not suitable for extremely uneven surfaces. |
| Save time by leveling automatically. | May require prior priming on certain floors. |
| Compatible with various types of finishes. | Quick drying, leaving little room for corrections. |
| Great strength and durability. | It can be expensive in large stores. |
| Allows decorative finishes. | Not suitable for outdoor use unless protected. |
Difference between Leveling Paste and Self-Leveling Mortar
Although leveling paste and self-leveling mortar are often confused, both materials have key differences:
| Aspect | Leveling Paste | Self-leveling mortar |
|---|---|---|
| Material | Composed of resins and fine particles | Composed of cement, sand and chemical additives |
| Applicable Thickness | Up to 5 mm | From 5 mm to 50 mm |
| Main Uses | Level out small irregularities or smooth surfaces | Level large surfaces and correct significant unevenness |
| Drying | Fast, in less than 24 hours | Slower, may take up to 48 hours |
| Suitable for | Interiors, especially for small jobs | Interiors and exteriors with greater structural demand |
| Endurance | Lower mechanical resistance | High mechanical resistance and durability |
Quick explanation:
- Leveling paste: Ideal for small jobs with less unevenness and a fine finish.
- Self-leveling mortar: Designed for larger areas with significant slopes and greater resistance.
Steps to apply self-leveling mortar
- Surface preparation:
Clean the area well, removing dust, grease, or traces of old materials. - Primer:
Apply a suitable primer to improve the adhesion of the mortar. - Mixed:
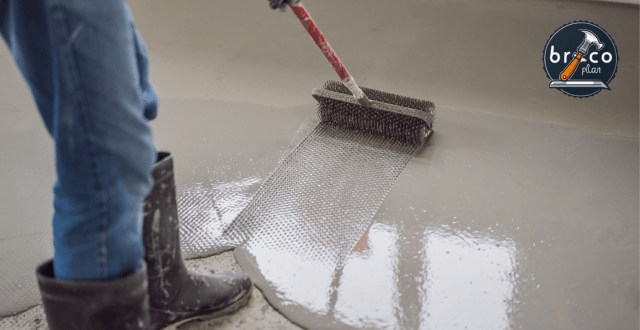
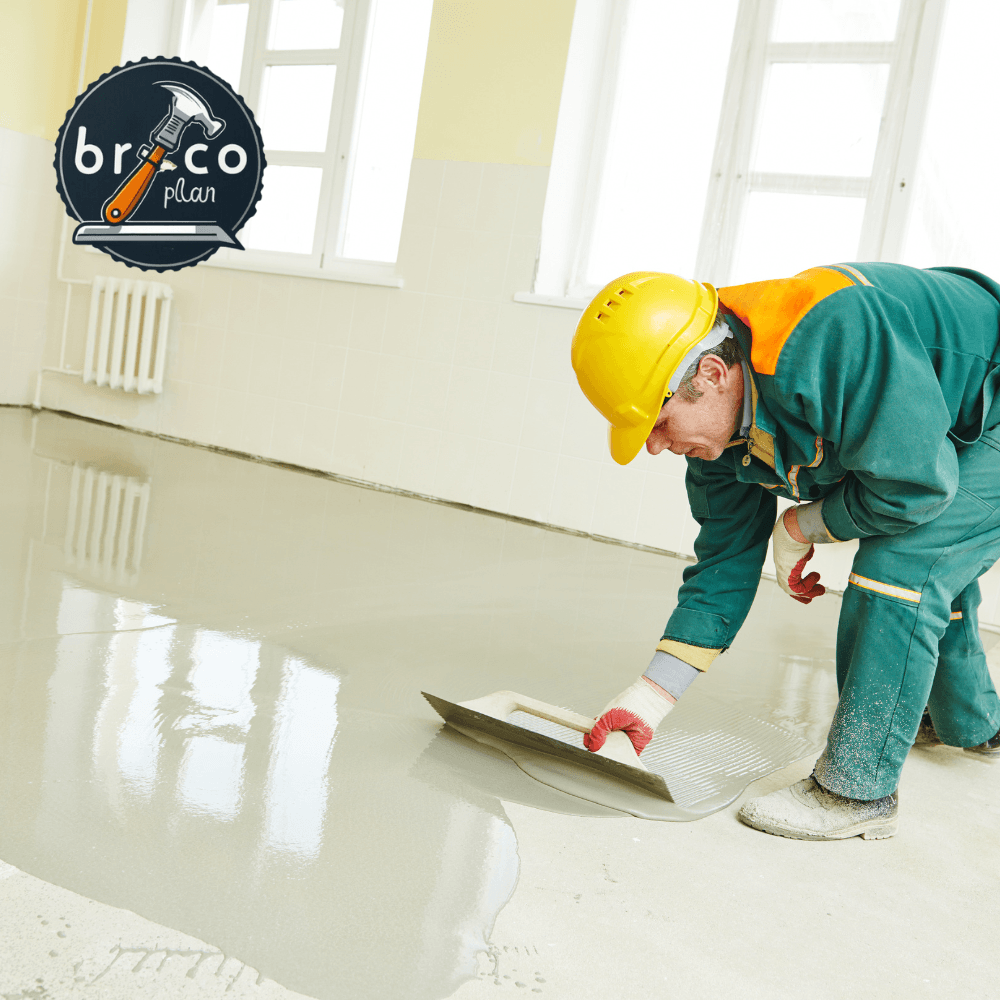
Follow the manufacturer's instructions to achieve the proper consistency. - Pouring and leveling:
Pour the mixture and spread it using a trowel or spiked roller to remove air bubbles. - Drying:
Allow to dry for the time indicated on the packaging before applying the final finish.
Price of Self-Leveling Mortar
The cost of self-leveling mortar can vary depending on the brand, type, and performance:
| Type of Mortar | Price Range (€/m²) | Features |
|---|---|---|
| Basic Mortar | 5 – 10 €/m² | Economical, ideal for small interior surfaces |
| Reinforced Mortar | 10 – 20 €/m² | Greater resistance, suitable for outdoors |
| High Fluidity Mortar | 20 – 35 €/m² | Professional use, ideal for leveling large surfaces |
| Heavy Duty Mortar | 35 – 50 €/m² | High mechanical resistance, recommended for industrial areas |
Summary of the different Self-Leveling Mortars:
- Basic Mortar: Most economical option for simple home projects.
- Reinforced Mortar: Ideal for outdoor areas with greater durability.
- High Fluidity Mortar: Perfect for large surfaces, used by professionals.
- Heavy Duty Mortar: For high traffic or industrial areas, with a higher cost.


FAQs – About Self-Leveling Mortar
Conclusion: What type of self-leveling mortar should you choose?
Choosing the right self-leveling mortar depends on several factors, such as the type of surface, the environment (indoor or outdoor), and the intended use of the space. To ensure a flawless finish that meets all your needs, I recommend the following:
- For residential interiors:
Use a standard self-leveling mortar, ideal for smooth surfaces where flooring such as parquet, ceramic, or vinyl will be installed. If the surface has minor irregularities, this option is sufficient. - For high traffic or commercial areas:
Choose a fiber-reinforced self-leveling mortar. This type offers greater compressive strength and is ideal for supporting heavy loads or constant traffic. - For outdoors:
Make sure you choose a self-leveling mortar specifically designed for exteriors that's resistant to weather changes and moisture. Make sure it includes anti-slip properties if the area will be heavily used. - With radiant heating:
Choose a high-flow self-leveling mortar compatible with radiant heating. This type ensures even coverage and maximizes heat transfer. - For quick repairs or minor touch-ups:
If you only need to level small areas, a leveling paste may be more practical and economical.
Final Recommendation:
Always check the product specifications and follow the manufacturer's instructions. If you have any doubts, consult a professional to ensure a perfect and long-lasting finish. Remember that base preparation and proper application are just as important as the type of mortar you choose.
Additional tickets for Bricoplan
- Definitive Guide to Epoxy Resin
- Vinyl Flooring: Versatile, Affordable, and Easy to Install
- Renovate your kitchen without construction work
- Remodel Your Bathroom on a Budget: Complete Guide
- Analysis of Fisher Thermal Insulation Paint
- Best Folding Workbench: Complete Guide
- The 5 Best Self-Leveling Laser Levels
- 20 Easy DIY Home Projects
- The Ultimate Guide to Art Plaster, Ceramic Plaster, and Modeling Plaster
- Industrial Style Interior Design: Ideas and Tips
- 12 DIY Tools to Give as Gifts